

Good thing Mother's Day was coming! I don't REALLY think ya'll need a tutorial for this, but I took the pictures anyway.
You need:
Pre-cut Cards (or just hack down some cardstock to the size you want)
Fabric Scraps (mmm... I love me some fabric scraps.)

Heat N Bond (or Wonder Under, etc)
Rotary Cutter, Mat & Ruler - though... your mat will probably be in better condition than mine.. oy.

IRON
Sewing Maching (could totally be optional)
Step One:
Put on a good movie. I recommend this one.
Step Two (aka the real first step):
Cut your Wonder Under to the same size as the front of the card you'll be making. Mine was 4"x 5.5". Evs.
Step the Third:
Cut (or tear!) your fabric into random widths and play around with the layout.

Step Foursies:
Pretend you know how to quilt and sew them together all pretty like. Iron. Notice how I added an extra strip from the previous picture? As I was sewing it together, I realized it wouldn't be wide enough, so I improvised. I give you permission to do the same.

With your ruler & rotary cutter, cut down your mini quilt into the dimensions of the front of your card (and the piece of Wonder Under you've pre-cut.

Iron your Wonder Under (sticky side down unless you WANT to ruin your iron) to the wrong side of your fabric. Follow the directions on your particular brand of sticky stuffs. Peel the paper backing off. You should be left with the back of your mini-quilt looking shiny.

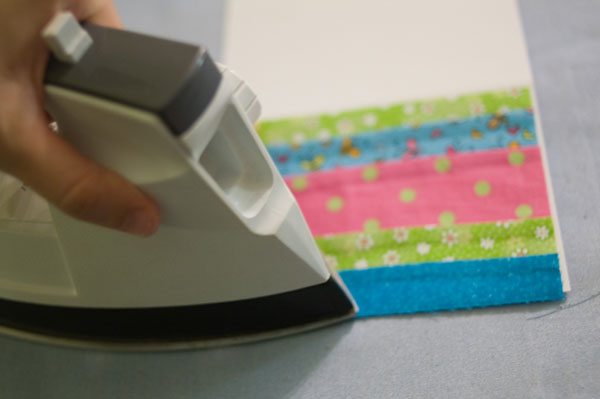
Flip it over and iron it onto the front of your card. The adhesive on the back of the fabric will fuse it to the paper. I do, however, recommend doing a better job at lining up your fabric than I did on this particular card. Duh. I had to pull it off quickly and re-iron. I'm a genius.
You're done if you want to be. You could add some embellishment in the form of buttons, ribbons, etc etc.

Some other tips and ideas:
- I mentioned before that you don't NEED a sewing machine. True story. I made two without using mine. I simply laid my fabric strips (overlapped slightly) carefully on top of the Wonder Under and ironed them right to it. They stuck together.
- You could add some decorative stitching after the whole thing is sewn together... I recommend doing it after you've applied the Wonder Under and peeled the paper off and before you iron it to the card.


11 comments:
very cute! love them!
Veeeeery cute! You are making me want a cricut. You should get a commission check if anyone who reads your blog goes and buys one. :)
As I mentioned in talking, I so want to make some of these. One day I'm going to get around to it. Thanks for the tut.
thank you thank you thank you! will you post this on my blog hop while i run to get some underwonder?
You might be thinking of Made. dana-made-it.com post on April 21st.
Sorry- I peeked!! Adoreable. Just a note (no pun intended)- if you make everything just a little larger, then cut it down to size you will be much happier and won't have to worry about whether it fit s the note card or not.
LOVELY!
I love sewing cards.. I never buy them...
You and JoAnn are so dang creative between the two of you, you could open your own crafting store!
This is a very nice idea! The cards are so adorable!
DARLING!
So I was organizing my bookmarks and I had your valentines cards with the photos and suckers book marked. They turned out so cute with my two boys.
Anyway....these are adorable, and I've got some wonder under, how awesome is it that I have all the supplies for a cute project?! Thanks for sharing this tutorial I would have been clueless.
Post a Comment